Copyright © Ruby's Musings
Design by Dzignine
Showing posts with label Home. Show all posts

Tuesday, April 26, 2016

Ruby's Coffee Cake Muffins

Something yummy is baking here at Muse Cottage!


It is recipe time here on Ruby's Musings. This go around I have a sweet treat that though not sinless, isn't the worst for you either, and made into muffins, it helps with portion control! When I was formulating this recipe, based on a basic coffee cake recipe from the 1950's , I was having a hard time coming up with a good name for it, so hence the above title for them. These yummy coffee cake muffins have the sweet juice of oranges, chunks of semi sweet chocolate, and crushed bits of candied cinnamon almonds. It is a very dense, loaf or coffee cake texture, but it is still moist. It has a slight bit of chew from the almonds and then the creamy texture of the chocolate bits. The recipe does include shortening, but could be switched out for coconut oil, the solid variety, or even for a lighter version, sour cream...even fat free. The orange juice could be tangerine, but really any other would not go as well. The chocolate is optional, or could be substituted with dark, milk or even white varieties. The candied almonds could be substituted for any nut candied or not... I prefer candied/spiced nuts as it adds a nice flavor profile. I bought most of my ingredients, all but the flour which is King Arthur Flour, and my spices which I buy online through a spice company, at Trader Joes, but you can of course shop at your local market. This could be made into a loaf OR in an 8x8 cake pan, or a round one if that is what you have, and of course that will make baking times change, as muffins that are medium size, and make a dozen, I baked them for 25 minutes. If you made them smaller, you can of course get more and bake them for less. I chose muffins for portion control. 


Let's talk toppings. I chose to not use any, but I could see this with holes poked into them and some kind of orange glaze soaking them through, or a orange flavored powdered sugar and orange juice glaze drizzled on top. Perhaps you would like a cream cheese and chopped nut frosting on them, perhaps you want to top them with a crumble or raw sugar...all would be very tasty and kick them up a notch. So let's get onto the recipe.....

What you need...
 2 cups of sifted flour 
1/2 tsp of baking soda
*1/4 tspnutmeg
*1/4 tsp allspice
*1/4 tsp cinnamon 
( *I used a all purpose baking spice )
1/4 tsp salt
1/3 cup shortening 
1 cup brown sugar packed lightly
2 eggs, room temp...beaten until thick
1  tbsp grated orange rind..less if dried 
3/4 cup orange juice...with pulp 
1/2 cup chocolate chips or chunks* 
1/2 cup crushed candied nuts*
( you can add up to 3/4 cup without issue if you like, or use less if you like) 


What you need to do....

Sift flour, baking soda, spices and salt together and set aside. 
cream shortening and sugar until creamy.
If you have not already beat eggs until thick and then add to shortening mixture.
And in orange rind and mix to blend. 
Add sifted ingredients and orange juice alternately, beating thoroughly after each addition.
Add nuts and chocolate and blend once again until incorporated.  

Pour into either greased or lined cupcake pan or into a greased pan of choice at 350 degrees...
bake cupcakes for 25 minutes or until toothpick comes out clean , if baking in a cake pan it can bake upwards of 50 minutes... adjust accordingly for your oven 

Don's skip the sifting, it is important. 

Ok you caught me, I bought a selfie stick so I can take my own photos.

Make sure you add your sifted ingredients a bit at a time.....
....with juice alternately .

I used my grinder to help crush the almonds, but you could do so in a baggie and a hammer or if a soft nut with a knife. 

Using a scoop helps to assure you get even amounts in the muffin cups. 


Cool thoroughly on a baking rack

Store in an air tight container. 


Brooches available through    


 Click here for the Ruby's Musings Channel 


Tuesday, April 12, 2016

Ruby's Musings by Request ~ Meet Cherry Darling

Ms. Cherry Darling 


It was a day just before the holidays when I had decided to follow a woman with a the handle of @she_knits_in _pearls aka Cherry Darling. I spotted one of her knitted creations and I asked her if she had ever made tea cozies. A friendship was struck up and bonding happened. This lovely woman decided instead of me paying for the said tea cozy she would just send it to me, and I decided we should do a gift exchange. Our friendship was sealed from there. Seems we share a lot of health woes, though, and not to divulge too much, hers far outweigh mine, so we were pain sisters, not to mention  tea drinking, retro loving sisters too. As it would happen I had purchased a headband from her Etsy store and had not even realized it, So now we were cherry wearing sisters too! Recently, I had spotted a cute knitting pattern for a pin curl headband, and before I could even mention it to her, she was already knitting one... I of course had to have one, and thus came about a little trade. I would get a super cute pink knitted pincurl cover, and in return I would help spread the word about her Etsy shop that she shares with her mom....it was a pretty good deal! I just love Cherry, her and her mom's creations and look forward to getting to meet her in person one day! I can with confidence mark anything from her and mom's shop "Ruby's Musings Approved"!

Let me introduce you to Cherry Darling....


Tell my readers a bit about yourself?

" I'm 40 years old and currently on my last leg of college before I start a whole new career and chapter in my life.  

Previously, I was a CNA (Certified Nurse Aide) working towards becoming a RN.  Unfortunately, that path   was derailed by a back injury that has left me unemployed and in chronic pain for the last 3 years.  On the bright side, I have been able to start blogging and work on my creative side. You can check out my personal blog She Knits in Pearls. (Here)

                                                                                                                                                                   
 Have you always been into the retro culture?

"No, I haven't.  All through my younger years, you would have considered me somewhere between Goth and Punk.  In my thirty's, my style melded into a Goth/Rockabilly style and slowly that turned more towards the Rockabilly and into a retro/vintage style."


 How did you come up with the handle Cherry Darling?


"The name Cherry was given to me in my early 30's when I became friends with another friend of the same birth name.  Instead of just one of us using a nickname to help with confusion we both got nicknames.  Because I have/had multiple sets of cherries tattooed on me, Cherry became my name.  The Darling part came along a few years later when I was working, part time, in a restaurant.  My manager had the same name so again I went by Cherry (my first paycheck was made out to Cherry and I couldn't cash it).  When expo would call my name to let me know my food was ready she would yell out Cherry Darling.  It's stuck, ever since.  I've toyed with the idea of changing my on-line name for a while due to the numerous Cherry's out there, but it's been so long and it's not just my online friends who know me as Cherry, I'm afraid it would be a big confusing mess if I did." 

 How long have you been knitting ? When did you start and who taught you?
"I've knit off and on for about 15 years.  I've learned from friends and online resources.  I never thought I'd be a knitter.  I used to have 101 creative hobbies and always thought that knitting would be the one I'd never do.  Then I found a hat pattern that I just had to make but it was knit.  Once I learned, almost all other creative hobbies completely fell away.  It was knitting that actually got me into vintage and retro style.  As I was searching for patterns that fit into my "rockabilly" style, I discovered all these vintage and retro inspired patterns.  The rest has been a wonderful and creative journey into who I am today."

Myself wearing Cherry's knitted pincurl cover.


 You sew too right? When did you learn/ how.?
"Sewing was my first real creative hobby.  I think I was sewing before my feet could reach the foot peddle, sitting on my Mama's lap.  Although, I've been sewing for longer than I can really remember, I don't consider myself a seamstress.  I'm pretty good at making skirts and other crafts (like the turbans and headbands in my etsy store) but when it comes to fitting issues, it usually turns into a hot mess.  I leave the real intense sewing to my Mom.  She's amazing like that". 


 You have an etsy store, tell us about that.
"Last summer, when I went to visit my mother in Nevada we tossed around the idea of opening our own Etsy store and doing craft fairs together when I move down there this fall (currently I live in Alaska).  After a few glasses of wine one evening we got online and registered our shop.  The name Lacey Rose Creations comes from our lovely dog Lacey we had as I was growing up and Rose is my moms maiden name.  We're just starting out and building a little stock at a time but really hope to kick it into gear after I move closer to her and we can have sewing and crafting days and focus on our business together".  


What type of products do you sell?
"Currently, I am making mostly turbans and headbands and would like to start taking small knitting commissions, like the pincurl wrap I made for you.  In the future I would like to keep making and expanding the retro/vintage inspired personal accessories.  My mom makes kitchen and sewing accessories.  She homes to branch out into long-arm quilting as well.....

We hope to grow into a great little family business that my mother and I can do together.  We want the experience of working and creating together and succeeding together.  We are both creative and constantly making things. If we can earn enough money to keep us in fabric and yarn, and maybe a little bit to help with the extras in life, while enjoying working together, we will consider it a success. Currently, every penny we make through Lacey Rose is being put in a fund to help me move to be closer to her."  


Cherry and her sweet mama


You can find Cherry and Lacy Rose Creations on Instagram as well.....

@She_Knits_in_Pearls and the shop... @LaceyRoseCreations

Tuesday, April 5, 2016

In "Love" with the King

I DO love the "King", but the King in this
post is NOT Elvis!


I am sure at this point that you all know I DO love Elvis, but this blog has absolutely nothing to do with that king, far from it. This weeks blog is all about flour. YES! You read that correctly, flour, as in baking flour, King Arthur Flour to be exact. So let me back up. It is not a secret I love baking, but in the past it had always been cookies and muffins for the most part, maybe a cobbler from time to time, but had not ever baked breads...well not yeast breads at any rate. I had not had much luck with bread baking, so I had given up and had not attempted any that were not from mixes. Then I ordered my 1950's cookbook, The Fantastic Fifties Cookbook by Mary Margaret McBride off of Amazon, and while going through it ran across a cheese bread recipe that sounded easy and tasty too. I made my first attempt at making the bread, using a store brand flour, it turned out pretty good, but it did not rise as much as I would have liked it to. It tasted good, but there was a bit of density to it that should not have been there. I decided to try again, but all I had on hand was whole wheat flour, and this time I hardly got any rise and the recipe just did not work out at all.  Not too long after, I was walking through the baking isle and stocking up my other supplies and I spotted King Arthur's Flour, with the slogan "Try it once. Trust it always." , I decided it was worth a try. The description, " Bake the highest-rising yeast breads ever with a flour milled exclusively for yeast baking: our unbleached bread flours, both conventional and organic. Higher-protein bread flour helps all loaves—from soft white sandwich bread to whole-grain loaves—rise their highest.
When would you choose bread flour instead of all-purpose? When your recipe calls for it; or if you like chewier pizza crust and bagels; or when you're baking whole-grain loaves that need a lift. Bread flour is perfect for any kind of yeast baking; please reserve it for that purpose." , further the encouragement to purchase the flour.... it had been around since the 1800's, and the baking hotline...which added a safety net of sorts....just in case of course. *wink* 

I dreamed of the perfect loaf of bread.

I was eager to give the new flour a try. So recently when having a special family gathering for the Easter holiday, I made the bread again using King Arthur Flour. I could tell right off the bat that this flour was different. It was very light and fluffy, promise of a light and fluffy loaf of bread? I followed the recipe, step by step, and right away in the first raising of the dough, it was so much higher than when I previously had made the bread. I was even more impressed by the second raise of the dough!! The test is the final product right? Well that was fantastic as well!! Just like the slogan stated, I tried it once, and will trust it always!!  Now I will say a little something on the side here, it states not to use on non yeast breads, but I did... I was in a bind and had muffins to make as well as French Madeline cookies, the muffins turned out just fine, and my Madeline cookies, well, they were a little too fluffy and a bit dry, so right after,  I went out and bought their basic flour and I will not use anything else now for my other baked goods such as cookies, etc., and if I could find their other varieties (and had the room to store them) , I would love to buy and try them.  King Arthur does has a wonderful web site that I linked to above where you can actually purchase their flours and other baking products, as well as gifts and supplies. They also have a really great about section and a full history of the company page. Heck if you live in Vermont you can go visit them!! I would for sure mark this flour and this company "Ruby's Musings Approved" !!  (*** I was in no way paid or prompted by the K.A.F.  company to write this blog. ) 
The Recipe....


The Flour .....


The Results....


The Proud Baker....


Friday, March 25, 2016

Living with a Retro Housewife~ My Family Speaks Up

....Oh hey there! So you want to know what it's
like to live with a retro housewife? ....


Hello again! Yes, that's right, you are not imagining things, this is a brand new blog post, and on the same day as my latest YouTube episode of At Home With Ruby's Musings, not to mention the unveiling of the GRAND OPENING of the HOUSEWIFE CHIC by Ruby shop on Etsy!! A busy, busy day here at Muse Cottage and in the Ruby's Musings world. I did however on Tuesday promise you in part one of this two part series, where you met some of my fellow retro housewives, that I would share with you what my family had to say on the matter.  I am being really brave here and letting them say what they want, without me editing them ( ok, maybe a little grammar correction, but that is it), and as I have a few Spring cleaning chores to get to, I am going to let them take over.....


Mr. Musings....


My wife and I have been together for a long, long time. In all our years together Ruby has changed her style many times' from the 20's and 30's, all the way to modern house wife (sweats and tee shirts). We have always been open to expressing one's own personal style, both for ourselves, and our children, who thru out their lives have also been free to expressed who they want to be and do. More often than not, my wife kept coming back to the retro style of the 50's as if she was drawn to it, she has now has finally realized this is who she truly is. For me, I have always supported my wife as a good husband should. Because as most people know, I do not really have a personal style, unless jeans and a tee shirt is a personal style. As a strong supporter of my wife wanting to be more of a retro house wife in the modern world, we have started to change some the things we eat (making meals from 50's cook books) , to the way we dress (working on me getting an actual personal style to match hers), and the way we decorate our house (going for classic retro not kitsch) as we live in a house built in 1940, it fits right in. Living with a retro house wife is a little more challenging then say your average housewife, as there are lots of little things we do that are slightly different than the average couple, like taking photos everywhere we go, having to wait sometimes for her to answer messages from one or more of her friend/fans from all over the world, and the fact it takes a little longer for her to get ready to go anywhere, since her hair, clothes, and make-up have to be just right (even for the grocery store). Thru it all, with everything that is changing and evolving in our lives I would not have her change anything as it makes my wife happy to be who she feels she truly is, which makes me very happy.

Mr. Musings ( Robert) 

Daughter No. 1 
My oldest Chanda, and myself last year during a visit home. I miss her daily! 
My mom has always been into fashion. The 50's style started when I was in high school, but then it was more pin-up/rockabilly than 50's housewife as she is now.  She would not go grocery shopping unless she was in full attire, including six inch heels most times and cat eye glasses ! I actually loved it , we could shop together and I loved the same style, as I still do love the pin- up/rockabilly style.  I think it's great that my mom now dresses back in the 50's style, it suits her and makes her happy, they have so much stuff out there where she is ( I am in Texas) for her to take pictures with and that are "retro" , and I like making a jello molds together ( a 1950's housewife thing for sure) , even if it ended up a partial fail but was so much fun, and yummy too! 


Daughter No. 2 

Rebecca and her boyfriend John 
Enigmatic, playful, fickle and sometimes downright frustratingly ever-changing but evolutionary style of my mother. She asked if I would write a few words about what it is like to have a vintage mother, or was it retro… I can hardly keep the terminology right - and I can only image how the sarcastically questioning look on my face scared her to read what I would actually say on the matter. My mother is an incredibly special breed of woman. She has spent the past 27 years of my life ever growing and becoming more comfortable in her skin, and during that time has changed her style as many times as the seasons come and go. It seemed like only last  year ( or was that now three years ago; time flies),  we were celebrating her fabulous gams and the bee’s knees of the 20’s and today it’s house gowns and circle skirts of the 40’s and 50’s. At times it is difficult to handle, as most of us stick to one style only ever buying a new sweater for winter, our jeans have worn out spots from years of wear - how do you buy for a woman who’s closet is an ever revolving door of styles? Once she got a handle on the style she has settled into, there is the never ending gawks of passerby’s on the street. I know when I leave the house, I don't care to be noticed, I don't care to have people look at me and wonder about why I do the things I do. My mother struts her stuff with endless confidence and stops for photo shoots just about everywhere, all while drawing a small crowd of on-lookers. Knowing my mother and the years it has taken to get to this place, this certain je ne sais quoi , has not been an easy journey - it can only be regarded with the utmost respect , something I hope to achieve as I get older. My mother has tattoos (shock and awe) , she dyes her hair crazy colors (the crowds gasps) and wears whatever the heck she wants. To me, having a “vintage” or “retro” mom has nothing to do with who she is, she chooses to dress how she wants , in what makes her feel good, makes her feel comfortable. To be honest, I don’t ever see my mom as a point in time, just because of how she dresses; I don't think what my mom wears defines who she is. I see my mom as a strong, independent woman - no matter the decade she chooses to embrace and something for all ages to inspire to become. 

Daughter No. 3
My youngest, Angel and her boyfriend Greg 
What's it like to have a retro mom?
Well, your mom is better dressed than most and completely breaks the stereotype of typical mom clothes. As you get older more people ask if you're sisters.
Not only on holidays but on a weekly basis there are yummy treats being made from a vintage cookbook that are to die for.
Once while out wine tasting, we had a shop owner tell us we won best dressed of the day and gave us a free wine bottle stopper as a prize.
Having a retro mom is inspiring to me because she shows me that when you find a way you love dressing and a culture you love that it makes you happy. A lot of people are afraid to be who they are because of the judgement of others, but she is out of the norm and rocks it everyday.


My heart was truly moved by reading what my family had to say...OH and before you ask about Chanda and where is the photo of her and her boyfriend ( I am still waiting on a really decent one) , and thought it would be nice to post one of the two of us. The leads to the question you all are now asking "Why don't you have photos of yourself with your other two daughters?" My middle daughter is rarely ready for a photo when I am, and vise versa, and it has been a couple of years even since we posed for a selfie! My youngest, though she tries to visit once a week, it is usually after she gets off work, and trust me she does not want her photo taken then! I am hoping this Summer when all my girls are in one place we can have a photo taken together and a nice one, where everyone is "ready" and can keep a strait face during the process. Easier said than done. I am so very blessed to have such a wonderful loving, supportive and UNDERSTANDING family...though trust me eyes do roll, and exasperated sighs can be heard from time to time, now I know that they will put up with me and with living with/ or dealing with a retro housewife for a spouse and mother. It is my hope that no matter how you, the reader dresses that you feel happy in your skin and that you have a supportive family such as my own!


Remember !! There is a new YouTube episode of At Home with Ruby's Musings each and every week, you can find me on FB, Twitter, Instagram, and even Pinterest just by searching for Ruby's Musings and now you can own a little bit of Housewife Chic by visiting my shop on Etsy by the same name! All the links are on the web version of this blog all the time and if you have any trouble, give me a shout and I will provide you with a link.


Tuesday, December 22, 2015

Here Comes Santa Claus....Cookies

"Santa Claus Cookies" circa 1950


As I wrap up this series of "Cooke Jar" cookies this December it seems appropriate to end with "Santa Claus Cookies". Even though our girls are all grown up, I still put out cookies for my Santa, they never go unappreciated. Of course all of us get even more busy in the last few days leading up to Christmas day, and even if we enjoy baking it seems like just one more thing, but these cookies were so very easy, and tasty too! They would make really great little presents to hand your delivery persons when they ring the door bell. I could see them in little baggies tied up with pretty ribbon as a thank you. So let's get on with my observations. 

Time to open the pages to "The Fantastic Fifties" 

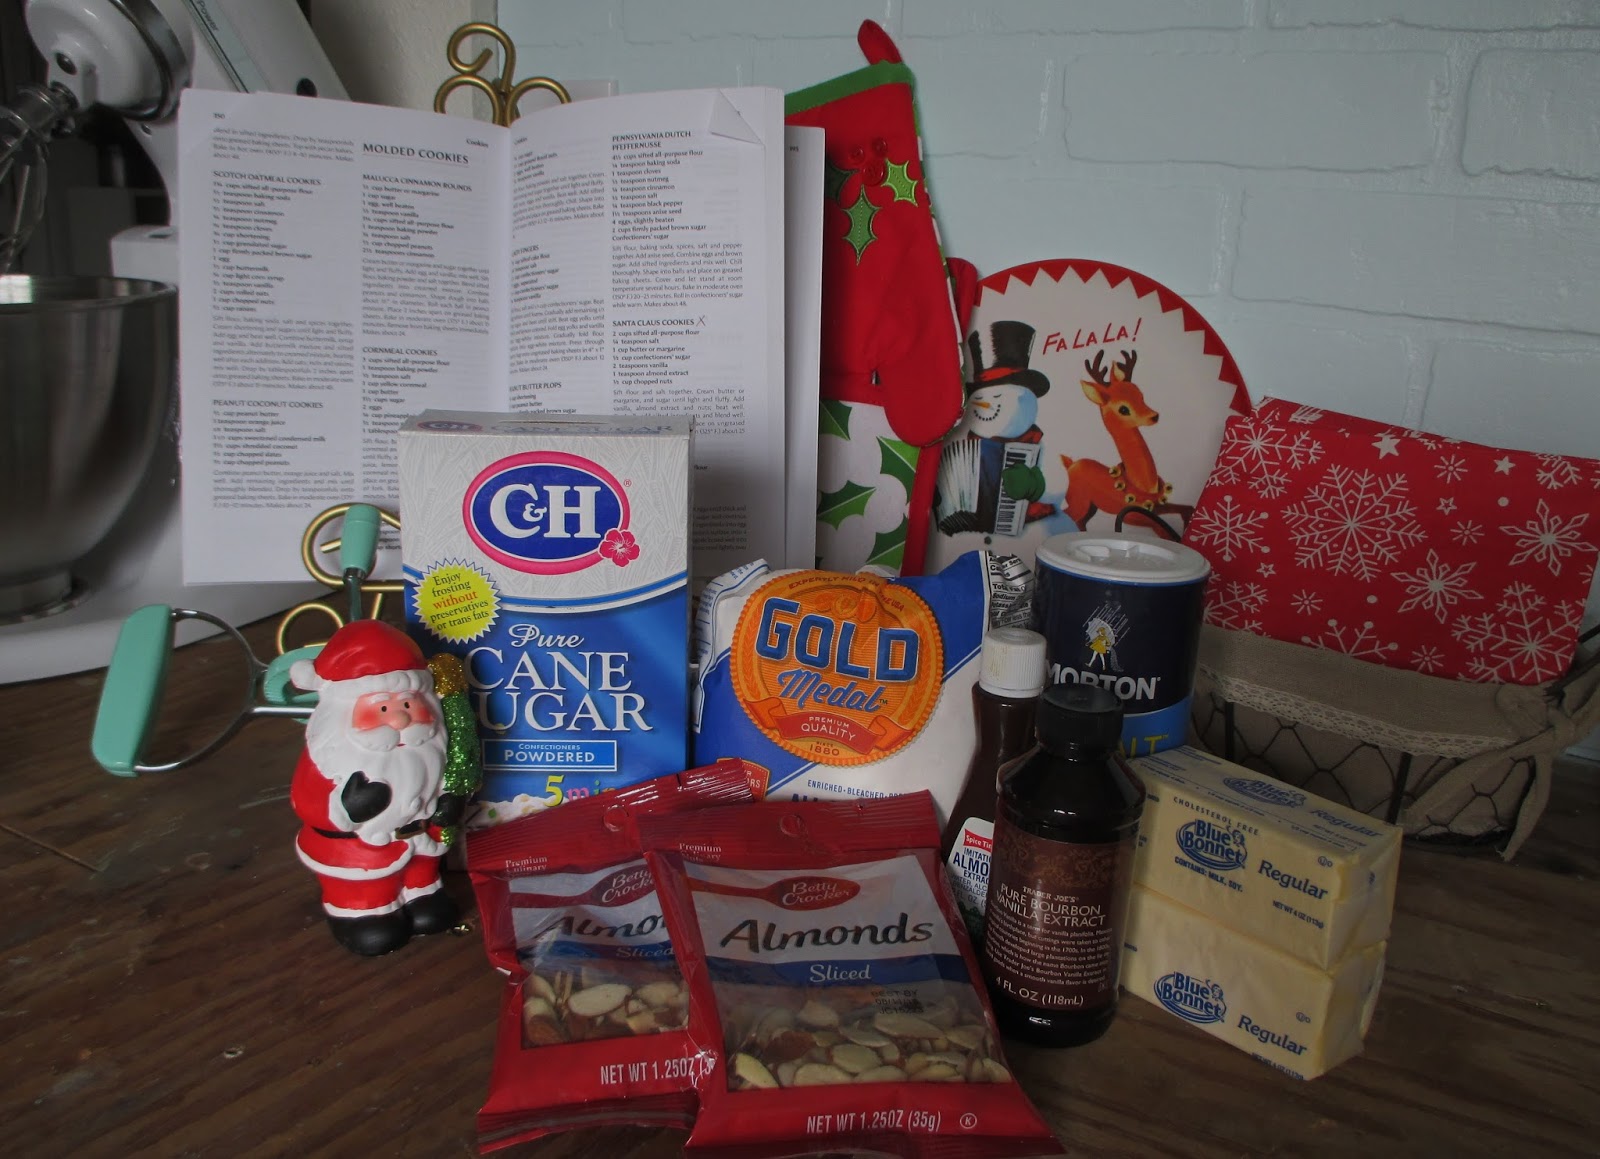
I always lay out my supplies ...OH look! Did you
notice I bought a cookie scoop? About time!

Observations, Results and Improvements...
Reading over the recipe, it was a simple one and even one I could easily memorize, and I do not say that very often. There was not too many steps, which I liked, so prep is quick. What I did not like is that they bake low and slow, meaning a 325 degree oven for app. 25 minutes, so this is not a quick to bake up recipe, you have to carve out some time for this one; gives you time to clean up and have a cup of tea tho. The dough is pretty dense, and having learned my lesson this month I decided to use my stand mixer, if you do not have one, use a wooden spoon after you use the hand mixer to cream the sugar and butter/margarine.  The recipe says it is a "molded" cookie, which means that the scoop or your hands are necessary, considering how long my nails are right now, I am glad I bought the scoop! It directs the maker to make one inch balls, my scoop as it turns out is more like a two inch scoop, so the size is like a smallish golf ball and the cookies should apparently be more like melon ball size. The recipe is to yield app. 40 cookies, I got 24 because mine were double the size. Baking time said 25 minutes, my first batch I baked for that and I feel they really needed one more minute. Great tip is to test the tops and if they spring back they are done. The cookies do not spread out. I do not know if they would had I used butter as opposed to margarine, as there are no photos in the book it is hard to know; they could be meant to be marble like cookies.  Once they were done baking, cooling etc, they are crisp on the outside, say like a drop biscuit, and soft on the inside, moist too. As I said they taste really yummy, not too sweet, rich, even using the light margarine, and a faint taste of the almonds and vanilla.  So would I make any improvements? I think I might like to try them in the smaller size, I also think that just out of curiosity I would like to smash them a bit and maybe add a slice of almond and sprinkle with raw sugar... of course baking times would then be cut due to not being round balls. My daughter said she could see them rolled in  powdered sugar, if left in the original form, then baked, rather like a Mexican Wedding Cookie or a Russian Tea Cake Cookie or Almond Crescent Cookie ...I think she might be onto something there. No matter what route you take with them, I very much encourage you to give them a whirl!

Let's Get Started!!


I always lay every thing out ...not just for photos. 

I accidentally bought slivered almonds...

No biggy...very easy to do a quick chop.

I always sift my dry ingredients even when it does not call for it.

Time to cream the sugar and margarine 

Yummy! So fluffy and pretty! 

Now you throw in the extracts and chopped almonds.

When done this is your dough.

Not knowing what the spread would be like the first batch I
only did nine...turns out they do not spread, so the next
batch I fit on over a dozen! 

You can see that I made 2 inch balls and spaced them about the
same distance. 

While one batch bakes, put the rest of the dough in the fridge,
just for food safety, though I did find it easier to scoop once it was
chilled. I could see this dough being formed into a log as well
and sliced to bake, or even frozen for  later use...just be sure to
adjust bake times. 

The longer bake time gave me ample time to clean up
and have a cup of tea.

As you can see they basically stay in the same shape as what they
went in as. To test doneness, touch the top to check if they
will spring back, also a tooth pick coming out clean is a back up. 

My first batch were very moist when broken open right out of the oven,
I ended up baking the rest for a full minute more just to make sure they were
done, but they are just butter/margarine , powdered sugar and almonds, so thinking
the moist look is normal. They did loose most of that appearance after they baked one extra
minute and cooled. IF they were the correct size, I feel 25 minutes would be perfect.
Happiest of Holidays!
From my heart to yours ....